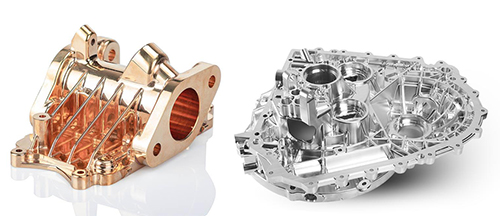
Precision CNC Milling Service
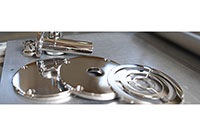
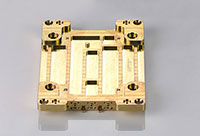
Precision CNC milling services are an advanced production method and are widely used by manufacturers around the world. The model of the product is made by the numerical control programming software, and the high-speed rotary cutter is cut on the target material to remove the excess material, and the designed precision milling product is obtained. JRY’s professional CNC machining engineer team will formulate the most reasonable machining route and machining program programming. Combined with professional precision machining and milling tools, it can complete complex shapes such as plane relief and meet the dimensional tolerance of CNC machining products. Surface finish and can be produced in large quantities. JRY uses precision 3-axis and 5-axis CNC machining milling machines (divided into vertical machining centers and horizontal machining centers). Multiple shafts can be used to machine very complex solid geometry and complete the look of the 3D model.
JRY specializes in the custom production of precision milling fixtures and fixtures, enabling us to quickly prototype our products for mass production and precision machining required by our customers.
JRY offers precision machining product manufacturing solutions and technical support services. High-efficiency production of one or small batches of orders in accordance with the product 3D model, materials: plastic and metal.
●One-stop service
●Quick Quote
●Quick proofing
●Mass production
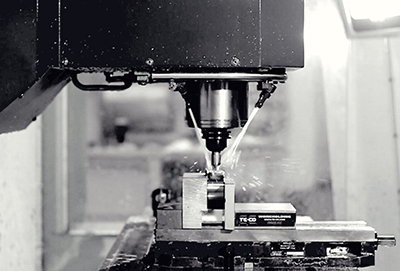
3-axis and 3+2 axis CNC milling machines have the lowest start-up machining costs. They are used to produce parts with relatively simple geometries.
| Size | Metric units | Imperial units |
| Max. part size for soft metals [1] & plastics | 2000 x 1500 x 200 mm 1500 x 800 x 500 mm | 78.7 x 59.0 x 7.8 in 59.0 x 31.4 x 27.5 in |
| Max. part for hard metals [2] | 1200 x 800 x 500 mm | 47.2 x 31.4 x 19.6 in |
| Min. feature size | Ø 0.50 mm | Ø 0.019 in |
[1] : Aluminum, copper & brass [2] : Stainless steel, tool steel, alloy steel & mild steel
| Size | Metric units | Imperial units |
| Max. part size for soft metals [1] & plastics | 2000 x 1500 x 200 mm | 78.7 x 59.0 x 7.8 in |
| Max. part for hard metals [2] | 1200 x 800 x 500 mm | 47.2 x 31.4 x 19.6 in |
| Min. feature size | Ø 0.50 mm | Ø 0.019 in |
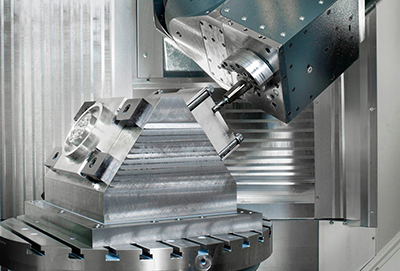
5-axis CNC milling centers can produce parts with complex geometries and increase productivity by minimizing the number of machine setups.
| Size | Metric units | Imperial units |
| Max. part size for all materials | 650 x 650 x 300 mm | 25.5 x 25.5 x 11.8 in |
| Min. feature size | Ø 0.50 mm | Ø 0.019 in |
Here is a list of our standard CNC machining materials available through our online platform.
| Aluminum | Stainless steel | Mild, Alloy & Tool steel | Other metal |
| 6061-T6 | 303 | Mild steel 1018 | Brass C360 |
| 6082 | 304 | Mild steel 1045 | Copper C101 |
| 7075-T6 | 316L | Mild steel A36 | Copper C110 |
| 5083 | 2205 Duplex | Alloy steel 4140 | Titanium Grade 1 |
| 5052 | 17-4 | Alloy steel 4340 | Titanium Grade 2 |
| 2014 | 15-5 | Tool steel O1 | Invar |
| 2017 | 416 | Tool Steel A2 | Inconel 718 |
| 6063 | 420 | Tool Steel A3 | Magnesium AZ31B |
| 7050 | 430 | Tool Steel D2 | |
| A380 | 440C | Tool Steel S7 | |
| MIC 6 | 301 | Tool Steel H13 |
| Plastics | Reinforced Plastic |
| ABS | Garolite G-10 |
| Polypropylene | Polypropylene (PP) 30%GF |
| Nylon 6 | Nylon 30%GF |
| Delrin (POM-H) | FR4 |
| Acetal (POM-C) | |
| PVC | |
| HDPE | |
| UHMWPE | |
| Polycarbonate | |
| PET | |
| PTFE (Teflon) |
Surface finishes are applied after machining and can change the appearance, surface roughness, hardness and chemical resistance of the produced parts.
| As Machined (standard) | Smoothed | Bead Blasted |
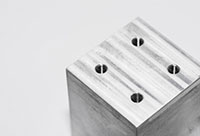 | 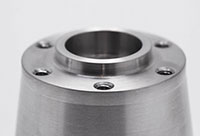 |  |
| ~125 RA µin (3.2 RA µm). Minor tool marks will be visible on the part. | Parts are machined at a lower feed rate in order to achieve a surface roughness of ~62.5 RA µin (1.6 RA µm). Surface roughness can be decreased up to ~32 RA µin (0.8RAµm) upon request. | Bead blasting adds a uniform matte or satin surface finish on a machined part, removing all tool marks. Mainly used for aesthetic purposes. |
| Anodized Clear or Color (type II) | Anodized Hardcoat (type III) | Powder Coated |
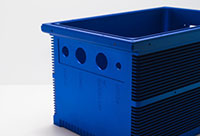 | 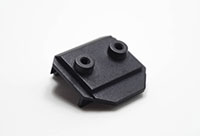 | 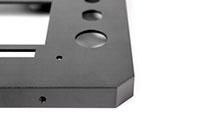 |
| Anodizing adds a thin, hard, non-conductive ceramic coating on the surface of aluminum parts, increasing their corrosion and wear resistance. Available in a variety of colors. | Hardcoat anodizing produces a thicker ceramic coating providing excellent corrosion and wear resistance. for functional applications. | Powder coating adds a thin layer of strong, wear and corrosion resistant protective polymer paint on the surface of a part. Available in a large range of colors. |
| Electropolished | Black oxide | Chromate conversion coating (Alodine/Chemfilm) |
 |  |  |
| Electropolishing is an electrochemical process used to polish, passivate and deburr metal parts. It is useful to reduce surface surface roughness. | Black oxide is a conversion coating used to improve corrosion resistance and minimize light reflection. | Chromate conversion coating is used to increase the corrosion resistance of metal alloys while maintaining their conductive properties. |
| Brushing | ||
| ||
Brushing is produced by polishing the metal with grit resulting in a unidirectional satin finish. |
Other surface finishes are also available. Learn more about our metal and plastic surface finishing capabilities here.
The table below summarizes the standard tolerances of the parts produced by certified 3D Hubs Manufacturing Partners. Tolerances up to .0008” (0.020mm) are available upon request.
| Part size / Dimension | Tolerance | Angularity |
| < 12’’ (300 mm) | ± .005’’ (0.125 mm) | ± 0.5° |
| < 24’’ (600 mm) | ± .010’’ (0.250 mm) | ± 1.0° |
| < 36’’ (900 mm) | ± 1/64’’ (0.400 mm) | ± 1.0° |
Tightest tolerance: ±.0008’’ (0.020 mm) Tighter tolerances are examined on a case by case basis with your technical drawings.
The table below summarizes the recommended and technically feasible values for the most common features encountered in CNC machined parts.
| Feature | Recommended size | Feasible size | |
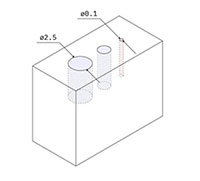 | Min. feature size | Ø 2.5 mm | Ø 0.50 mm |
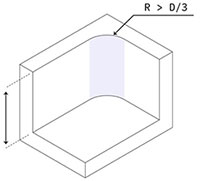 | Internal edges | R 8 mm | R 0.25 mm |
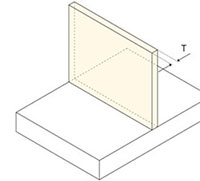 | Minimum wall thickness | 0.8 mm (for metals) 1.5 mm (for plastics) | 0.5 mm (for metals) 1.0 mm (for plastics) |
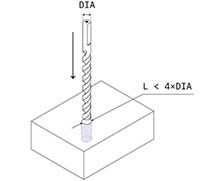 | Holes | Diameter:standard drill bit sizes Depth: 4 x diameter | Diameter: Ø 0.5 Depth: 10 x diameter |
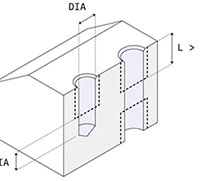 | Threads | Size: M6 or larger Length: 3 x diameter | Size: M2 |
Learn more in our Engineering Guide to CNC machining.

Full size report
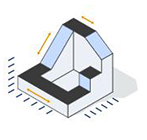
The part comes with detailed information on all required part dimensions, so you can rest assured that the part will run and assemble as designed.
Material certification
We provide product material certification, which can be traced back to material characteristics.

First part verification
We can provide two sets of parts to customers for verification according to customer requirements. After the parts are verified, we can put them into full production.
Contact person:Kevin
Cell phones:13825238091
Telephone:13825238091
Mailbox:sales@jinruiye.com
Address: Is a focus on tungsten steel cutting tools, PCD/MCD ultra-hard cutting tools and precision parts research and development, production and sales of innovative companies. Shenzhen Jinruiye Technology Co. , Ltd.